
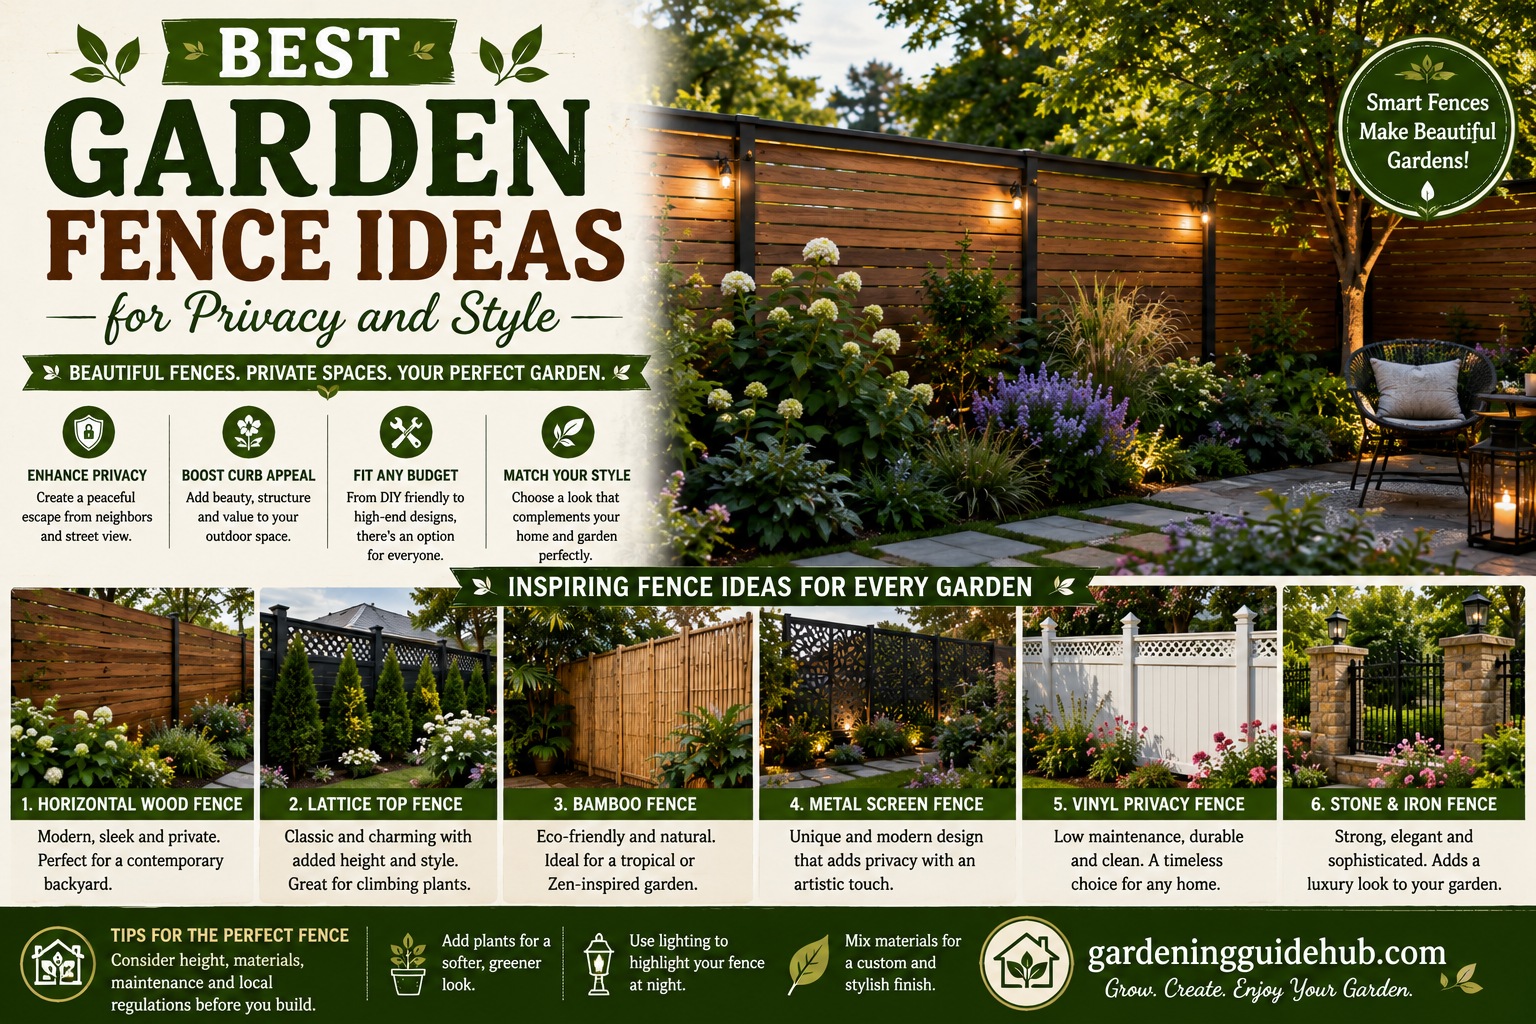
A garden fence does not have to be purely functional. Sure, it can mark a boundary or keep the dog from wandering into the tomatoes, but with a little creativity, it can also become one of the prettiest features in your entire yard. A decorative garden fence adds charm, structure, and personality to flower beds, vegetable gardens, or property lines, all while being a genuinely approachable weekend project
If you have been eyeing those picture perfect picket fences or scalloped garden borders online and wondering if you could actually build one yourself, the answer is a confident yes. This guide walks you through everything from planning and materials to building and finishing touches, so you can create a decorative fence that looks like it came straight out of a garden magazine. Let us get started. 🌸
Why Build a Decorative Garden Fence? 💛
Before grabbing your tools, let us talk about why this project is so worth the effort.
Benefits of a decorative garden fence:
- Defines and frames garden beds, giving them a polished, intentional look
- Adds vertical interest and charm to an otherwise flat landscape
- Provides a subtle barrier against pets or small critters without feeling like a wall
- Offers a structure for climbing plants like sweet peas or morning glory
- Costs significantly less than a full privacy fence, since decorative styles use less material
Unlike a tall privacy fence, a decorative garden fence is meant to be seen through and admired, adding beauty rather than blocking views entirely.
Quick Overview: Popular Decorative Fence Styles 📊
Here is a simple table comparing some of the most popular decorative fence styles to help you choose the right one for your garden.
| Style | Height Range | Best For | Approximate Cost Per Linear Foot |
|---|---|---|---|
| Classic picket fence 🏡 | 2 to 4 feet | Cottage gardens, front yards | $10 to $20 |
| Scalloped picket fence 🌊 | 2 to 3 feet | Romantic, whimsical borders | $12 to $22 |
| Wattle fence 🌾 | 1 to 2 feet | Rustic vegetable garden edging | $6 to $15 |
| Split rail fence 🪵 | 2 to 4 feet | Country or farmhouse style yards | $8 to $18 |
| Wire and post fence 🔩 | 2 to 3 feet | Supporting climbing vegetables | $5 to $12 |
| Bamboo edging fence 🎋 | 1 to 2 feet | Casual, natural garden borders | $6 to $14 |
Choosing a style that matches your garden’s overall personality, whether that is romantic cottage charm or relaxed rustic simplicity, helps the fence feel like a natural extension of the space rather than an afterthought.
Step One: Planning Your Design 📐
Before cutting a single board, take time to plan out exactly where your fence will go and what purpose it will serve.
Things to consider:
- Purpose, whether the fence is purely decorative or needs to keep out small pets or wildlife
- Height, since decorative fences typically stay under four feet to maintain an open, welcoming feel
- Layout, mapping curves, corners, and gate placement before building
- Existing garden beds, ensuring the fence complements rather than crowds your plantings
- Local regulations, checking if any permit is required, though decorative fences under a certain height rarely need one
Sketching your layout on paper, even roughly, helps you estimate materials accurately and visualize how the finished fence will look within your garden.
Quick Overview: What You Will Need 📋
Here is a simple table summarizing core supplies for a standard decorative picket style fence, based on a twenty foot run.
| Item | Purpose | Estimated Cost |
|---|---|---|
| Wooden pickets (30 to 40) 🪵 | Main decorative fence material | $2 to $5 each |
| Horizontal rails (2 per section) 📏 | Structural support for pickets | $5 to $10 each |
| Fence posts (4×4, treated) 🧱 | Anchoring the fence into the ground | $10 to $20 each |
| Concrete mix 🧱 | Securing posts in the ground | $6 to $10 per bag |
| Exterior screws or nails 🔩 | Assembling the frame | $10 to $15 per box |
| Sandpaper or sanding block 🧽 | Smoothing rough edges | $10 to $20 |
| Exterior paint or stain 🎨 | Finishing and weatherproofing | $25 to $50 |
Total cost for a modest decorative fence run typically falls between one hundred fifty and four hundred dollars, depending on style, length, and finish choices.
Step Two: Setting Your Posts 🧱
Sturdy posts form the backbone of any fence, decorative or otherwise, so this step deserves careful attention even for a lighter weight structure.
How to set posts properly:
- Mark post locations along your planned fence line, typically spacing posts six to eight feet apart
- Dig holes about eighteen to twenty four inches deep, depending on your fence height and local frost line
- Add a few inches of gravel at the bottom of each hole for drainage
- Place the post in the hole and check it is perfectly level on all sides
- Pour concrete mix around the post, following the product’s water ratio instructions
- Brace posts with scrap wood while the concrete cures, usually twenty four to forty eight hours
- Repeat for each remaining post, checking that all posts line up evenly along your planned layout
For a shorter decorative fence, some gardeners skip concrete entirely and simply pack soil tightly around posts, though concrete offers significantly more stability and longevity.
Step Three: Attaching Horizontal Rails 📏
Once your posts are set and cured, it is time to add the horizontal rails that will support your pickets or decorative panels.
Installation tips:
- Attach one rail near the top and one near the bottom of each fence section for stability
- Use a level frequently to ensure rails stay straight across the entire run
- Pre drill holes before screwing into posts to prevent splitting, especially with drier wood
- Space rails appropriately based on your picket height, typically leaving a few inches of clearance at both the top and bottom
Taking time to get your rails perfectly level now makes attaching pickets in the next step significantly easier and more accurate.
Step Four: Attaching Pickets or Decorative Elements 🌊
This is where your fence really starts to take shape and show off its decorative character.
For a classic picket fence:
- Measure and mark even spacing between each picket, typically leaving one to two inches of gap
- Attach pickets to the horizontal rails using exterior screws or nails
- Use a level frequently to keep pickets straight and evenly spaced
- Trim picket tops into a classic point, rounded top, or flat style depending on your preferred look
For a scalloped design:
- Cut pickets in graduated heights, shortest at the center of each section and taller toward the posts
- Attach pickets following the same even spacing method as a classic picket fence
- Sand the curved top edge smooth for a polished, wave like silhouette
For a wattle fence:
- Drive thin, flexible branches or stakes into the ground at close, even intervals
- Weave thinner, pliable branches horizontally between the stakes, alternating in front and behind each one
- Continue weaving upward until you reach your desired height, tucking loose ends securely
Each style creates a distinctly different look, so choose the method that best matches the overall personality of your garden.
Step Five: Adding a Gate 🚪
If your fence encloses a garden bed or defines an entry point, a small decorative gate completes the look beautifully.
Gate building basics:
- Build a simple rectangular frame using 2×4 lumber, matching your fence height
- Attach decorative pickets to the frame using the same spacing as your main fence
- Install sturdy hinges on one side and a latch or hook closure on the other
- Ensure the gate swings freely without dragging on the ground
A simple arched trellis built above the gate opening adds an extra charming touch, especially if you plan to train climbing plants like roses or clematis over it.
Step Six: Sanding and Finishing 🎨
This step transforms your fence from a basic wooden structure into a polished garden feature.
Finishing checklist:
- Sand all exposed edges and surfaces to remove splinters
- Wipe away sawdust with a damp cloth before applying any finish
- Apply exterior paint or stain in your chosen color, using two coats for even coverage
- Allow full drying time between coats, typically a few hours depending on weather
- Consider a clear sealant for extra weather protection, especially in humid climates
Popular finish choices for decorative fences:
| Finish | Look | Best Paired With |
|---|---|---|
| Crisp white paint ⚪ | Classic cottage charm | Colorful flower beds |
| Soft sage green 🌿 | Blends naturally into garden greenery | Cottage or English gardens |
| Natural wood stain 🪵 | Warm, rustic feel | Farmhouse or country style yards |
| Weathered gray ⚫ | Coastal, relaxed aesthetic | Modern or minimalist gardens |
Choosing a finish that complements your existing garden palette helps the fence feel like a cohesive design choice rather than a standalone structure.
Adding Climbing Plants and Greenery 🌸
A decorative fence becomes even more charming once plants begin to grow alongside it, softening hard lines and adding natural texture.
Great plant pairings for decorative fences:
- Sweet peas for fragrant, colorful blooms along picket fences
- Morning glory for fast growing, casual coverage
- Climbing roses for a romantic, classic look
- Nasturtiums trailing along the base for pops of color
- Clematis for elegant, long lasting blooms
Training plants along a decorative fence not only adds beauty but also softens the transition between your structure and the surrounding garden beds.
Maintenance Tips to Keep Your Fence Looking Great 🛠️
A decorative fence, while lighter than a full privacy structure, still benefits from regular care.
| Task | How Often |
|---|---|
| Inspect for loose boards or screws 🔍 | Every 6 months |
| Reapply paint or stain 🎨 | Every 1 to 2 years |
| Check post stability 🧱 | Once a year |
| Trim climbing plants away from joints 🌿 | Seasonally |
| Clean surface dirt and mildew 💦 | Once or twice a year |
Staying ahead of small repairs and touch ups keeps your decorative fence looking fresh and charming for many seasons to come.
Common Mistakes to Avoid ⚠️
Even a simple decorative project can run into a few avoidable issues.
- Skipping proper post depth, leading to leaning or instability over time
- Spacing pickets unevenly, which is very noticeable in a decorative design
- Choosing untreated wood for posts that will be in direct ground contact
- Forgetting to account for gate swing space when planning your layout
- Rushing the finishing step, which is often what makes a decorative fence look truly polished
Taking your time, especially during the picket spacing and finishing stages, makes a significant difference in the final, professional looking result.
A Sample Weekend Build Plan 🗓️
If you want a clear plan to follow, here is how a typical decorative fence build might break down.
Saturday morning: Finalize your design, gather materials, and mark post locations along your layout.
Saturday afternoon: Dig holes and set posts in concrete, allowing time to begin curing.
Sunday morning: Attach horizontal rails and begin installing pickets or your chosen decorative element.
Sunday afternoon: Build and hang your gate if needed, then sand and apply your chosen finish.
Since concrete typically needs twenty four to forty eight hours to fully cure, some builders prefer setting posts a few days before tackling the rest of the build for the sturdiest final result.
Final Thoughts 🌼
A decorative garden fence proves that function and beauty can absolutely coexist. With some basic lumber, a weekend of focused effort, and a little attention to detail, you can build a charming border that elevates your entire garden, whether it frames a vegetable patch, defines a flower bed, or simply adds character to your yard.
So grab your tools, pick a style that speaks to your garden’s personality, and get building. By the time you finish, you will have a fence that does far more than mark a boundary, it will become one of the prettiest details in your entire outdoor space.
Happy building! 🌿🔨