
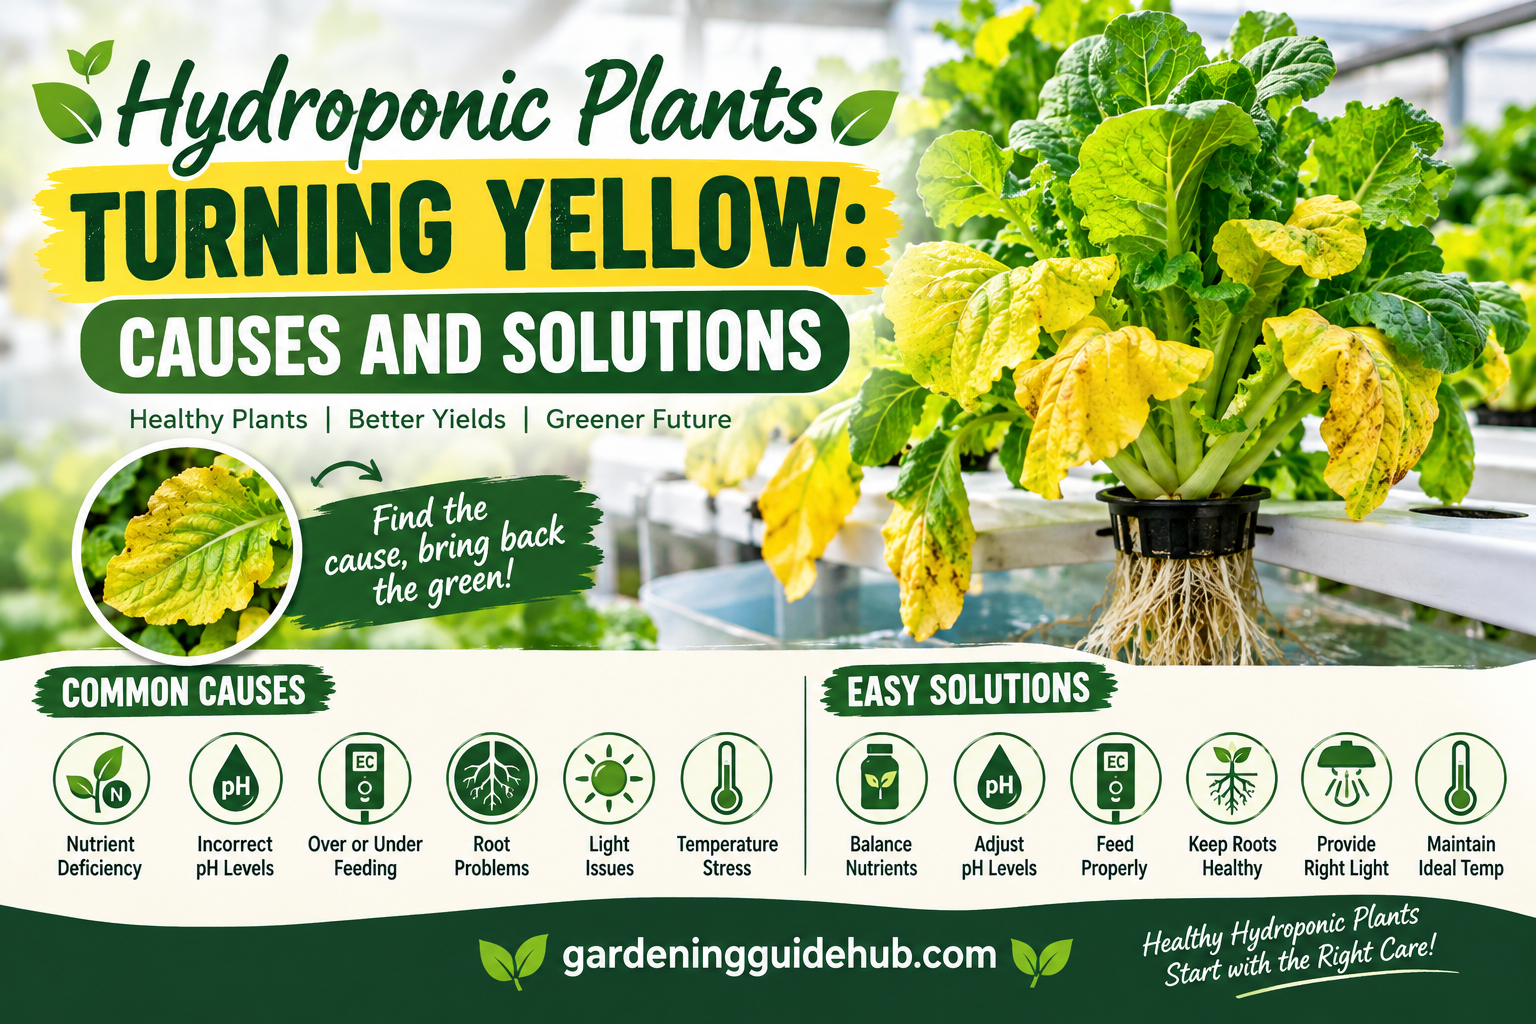
Hydroponic gardening is often praised as a clean, efficient, and highly controlled way to grow plants without soil. Yet even experienced growers run into a frustrating problem: leaves that were once vibrant green slowly fade to yellow. This condition, known as chlorosis, is one of the most common issues in hydroponic systems. The good news is that yellowing is almost always a signal, not a mystery. Your plant is communicating a specific need, and once you learn to read the signs, you can fix the issue quickly and prevent it from happening again.
In this article, we will explore why hydroponic plants turn yellow, how to diagnose the exact cause, and what solutions actually work. We will use tables, icons, and emoji throughout to make the information easy to scan and apply in your own grow room.
🔍 Why Yellowing Happens in Hydroponics
Unlike soil grown plants, hydroponic plants rely entirely on the nutrient solution you provide. There is no soil buffer to slowly release minerals or correct pH swings over time. This means problems tend to show up faster in hydroponics, but it also means they can be corrected faster once identified.
Yellowing, or chlorosis, occurs when a plant cannot produce enough chlorophyll, the pigment responsible for the green color in leaves and the engine behind photosynthesis. When chlorophyll production drops, the green fades and the yellow, orange, or even white pigments underneath become visible.
There are five major categories of causes:
- 🧪 Nutrient imbalances (deficiency or toxicity)
- ⚗️ pH problems
- 💡 Lighting issues
- 🌡️ Environmental stress (temperature, humidity, oxygen)
- 🦠 Root health problems (root rot, disease, pests)
Let us go through each one in detail.
🧪 Nutrient Imbalances
Nutrient related yellowing is the most frequent cause of chlorosis in hydroponics. Because you control the nutrient solution directly, an error in mixing, timing, or concentration will show up in the leaves within days.
Nitrogen Deficiency
Nitrogen is a core building block of chlorophyll, so a shortage almost always leads to yellowing. The telltale sign is that yellowing begins on the older, lower leaves first, since the plant moves nitrogen from older tissue to new growth to survive.
Iron Deficiency
Iron deficiency looks similar to nitrogen deficiency but behaves differently. Instead of starting on old leaves, iron deficiency shows up on new growth first, with yellowing between the veins while the veins themselves stay green. This is called interveinal chlorosis.
Magnesium Deficiency
Magnesium sits at the center of the chlorophyll molecule itself, so a lack of it directly limits how much chlorophyll a plant can build. Magnesium deficiency typically appears on middle to lower leaves, again with interveinal yellowing, sometimes followed by browning at the leaf edges.
Nutrient Toxicity
It may seem counterintuitive, but too much of a nutrient can cause yellowing as well. Excess nutrients raise the electrical conductivity (EC) of the solution to unsafe levels, which can burn root hairs and block the uptake of other elements, leading to a lockout effect.
Below is a quick reference table for nutrient related yellowing:
| Nutrient Issue | Where Yellowing Starts | Pattern | Common Fix |
|---|---|---|---|
| 🟡 Nitrogen deficiency | Older, lower leaves | Uniform yellowing | Increase nitrogen in feeding schedule |
| 🟢➡️🟡 Iron deficiency | New, upper leaves | Yellow between green veins | Add chelated iron, check pH |
| 🍃 Magnesium deficiency | Middle to lower leaves | Yellow between veins, edge browning | Add cal mag or Epsom salt supplement |
| ⚠️ Nutrient toxicity (EC too high) | Leaf tips and edges first | Yellow with crispy or burnt tips | Dilute solution, flush system with plain water |
| 🥀 Potassium deficiency | Older leaves | Yellowing with brown scorched edges | Increase potassium, check calcium to potassium ratio |
⚗️ pH Problems: The Silent Saboteur
Even a perfectly balanced nutrient solution becomes useless if the pH is wrong, because pH determines whether roots can actually absorb the nutrients available. Most hydroponic crops thrive in a pH range of about 5.5 to 6.5. Outside this window, specific nutrients become chemically locked out, meaning they are physically present in the reservoir but the plant cannot take them up.
For example:
- 📉 pH too low (acidic): calcium, magnesium, and phosphorus uptake suffers.
- 📈 pH too high (alkaline): iron, manganese, and phosphorus become less available.
This is why iron deficiency symptoms often appear even when iron is included in the nutrient mix. The iron is there, but if pH has drifted upward, the plant simply cannot access it.
✅ Solution for pH Problems
- Test pH daily with a calibrated digital pH meter.
- Adjust gradually using pH up or pH down solutions, never more than 0.2 to 0.3 points per adjustment.
- Recheck after a few hours, since pH can drift as roots and microbes interact with the solution.
- Keep a simple log so you can spot patterns over time, such as pH always drifting upward after 3 days.
💡 Lighting Issues
Light is the engine that powers photosynthesis, and both too little and too much light can cause yellowing.
Insufficient Light
When light intensity or duration is too low, plants cannot produce enough energy to build chlorophyll efficiently, leading to pale, yellowish, or stretched (leggy) growth. This is especially common in indoor setups with underpowered LED panels or lights positioned too far from the canopy.
Excessive Light or Heat Stress from Lighting
On the other end, lights placed too close to the canopy can scorch leaves, causing bleaching that starts as yellow and progresses to white or brown. High intensity lighting combined with poor ventilation also raises leaf surface temperature, accelerating chlorophyll breakdown.
| Lighting Issue | Symptom | Icon | Solution |
|---|---|---|---|
| Too little light | Pale, yellow, stretched stems | 🌥️ | Increase intensity or duration, move light closer within safe range |
| Too much light or heat | Bleached, yellow to white patches near the light source | 🔥 | Raise light height, improve airflow, check for hot spots |
| Wrong light spectrum | Weak, yellowish new growth | 🌈 | Use full spectrum grow lights appropriate for the growth stage |
| Inconsistent light schedule | Uneven yellowing, stress symptoms | ⏰ | Use a timer to maintain a consistent light cycle |
🌡️ Environmental Stress
Hydroponic systems are sensitive to environmental swings because there is no soil to buffer temperature or moisture changes. Several environmental stressors commonly trigger yellowing.
Water Temperature
Reservoir water that is too warm, generally above 75°F (24°C), holds less dissolved oxygen, which suffocates roots and impairs nutrient uptake, often resulting in yellowing that appears suddenly across many leaves at once.
Air Temperature and Humidity
Extreme heat accelerates transpiration, causing the plant to lose water faster than roots can replace it, which stresses the plant and can trigger yellowing as a defense response. Very low humidity has a similar effect, while very high humidity encourages fungal issues that indirectly cause yellowing.
Oxygen Levels in the Root Zone
Roots need oxygen just as much as leaves need light. Poor aeration in the reservoir, a failing air pump, or a clogged air stone can starve roots of oxygen, weakening their ability to absorb nutrients and water.
✅ Solutions for Environmental Stress
- Keep reservoir water between 65°F and 75°F (18°C to 24°C) using a chiller if needed.
- Maintain grow room temperature in a comfortable range for the specific crop, typically 65°F to 80°F (18°C to 27°C).
- Keep humidity between 40 percent and 60 percent for most leafy crops.
- Use a strong air pump and multiple air stones to keep the solution well oxygenated.
- Consider adding a beneficial oxygen booster additive if oxygen levels remain low.
🦠 Root Health Problems
Healthy roots are the foundation of a healthy hydroponic plant. When roots are compromised, yellowing is often one of the first visible symptoms above the water line.
Root Rot
Root rot is caused by pathogens such as Pythium that thrive in warm, low oxygen, stagnant water. Infected roots turn brown or slimy and lose their ability to absorb nutrients, which quickly shows up as yellowing leaves, wilting, and stunted growth.
Root Bound or Damaged Roots
In systems using net pots or growing media, roots can become tangled, compacted, or physically damaged during transplanting, all of which reduce nutrient uptake capacity.
Pests
Pests such as spider mites, aphids, and fungus gnats can damage roots or leaves directly, or introduce disease that leads to yellowing.
| Root Problem | Signs | Icon | Solution |
|---|---|---|---|
| Root rot | Brown, slimy roots, foul smell | 🦠 | Clean system, use hydrogen peroxide treatment, add beneficial bacteria, increase oxygenation |
| Root bound or damaged roots | Poor growth despite good nutrients | 🪴 | Handle roots gently during transplant, use appropriately sized containers |
| Pest infestation | Visible insects, sticky residue, speckled leaves | 🐛 | Use organic pest control, neem oil, or beneficial insects, isolate affected plants |
| Algae buildup in reservoir | Green film, reduced oxygen, root stress | 🟢 | Block light from reaching the reservoir, clean regularly |
🧭 Step by Step Diagnosis Guide
When you notice yellowing, follow this simple diagnostic process instead of guessing.
Step 1: Identify the location of yellowing 📍 Old leaves suggest nitrogen, potassium, or magnesium issues. New leaves suggest iron or calcium issues.
Step 2: Check the pattern 🔎 Uniform yellowing points toward nitrogen. Interveinal yellowing (yellow between green veins) points toward iron or magnesium.
Step 3: Test your pH and EC ⚗️ Use a calibrated meter to confirm both are within the ideal range for your specific crop.
Step 4: Inspect the roots 🌿 Lift a net pot or check visible roots for color and texture. Healthy roots are white or tan and firm. Brown, slimy, or foul smelling roots indicate rot.
Step 5: Review environmental conditions 🌡️ Check reservoir temperature, room temperature, humidity, and light distance.
Step 6: Review your feeding schedule 📅 Confirm you are using fresh nutrient solution, mixed correctly, and changed on schedule, typically every 1 to 2 weeks.
📋 Complete Quick Reference Table
| Cause Category | Key Symptom | Quick Test | Fast Fix |
|---|---|---|---|
| 🧪 Nitrogen deficiency | Old leaves yellow uniformly | Check feeding schedule and EC | Boost nitrogen concentration |
| 🍃 Iron or magnesium deficiency | New or middle leaves, veins stay green | Check pH first | Add chelated iron or cal mag |
| ⚗️ pH imbalance | Deficiency symptoms despite correct nutrients | Test pH with meter | Adjust to 5.5 to 6.5 range |
| 💡 Poor lighting | Pale, stretched, or bleached leaves | Measure light distance and duration | Adjust light height and schedule |
| 🌡️ Temperature stress | Sudden widespread yellowing | Check reservoir and room temperature | Cool water, improve ventilation |
| 🫧 Low oxygen | Wilting plus yellowing | Check air pump and bubbles | Add air stones, check pump function |
| 🦠 Root rot | Brown slimy roots, smell | Inspect roots directly | Clean system, treat with peroxide |
| 🐛 Pests | Visible bugs, speckling | Inspect leaf undersides | Neem oil or targeted treatment |
🛠️ Preventing Yellowing Before It Starts
Prevention is far easier than treatment in hydroponics. Consider building these habits into your routine:
- 📆 Test pH and EC daily, ideally at the same time each day for consistency.
- 🧴 Use high quality, hydroponic specific nutrient formulas rather than soil based fertilizers.
- 🔄 Change your reservoir solution completely every 1 to 2 weeks to prevent nutrient imbalances and salt buildup.
- 🌡️ Monitor water temperature with a simple aquarium thermometer.
- 💧 Keep oxygenation strong with reliable air pumps and check air stones for clogging.
- 🔍 Inspect roots and leaves weekly for early warning signs.
- 📝 Keep a simple grow journal noting feeding amounts, pH readings, and any changes you observe.
🌟 Special Considerations for Different Growth Stages
Yellowing can mean different things depending on the plant’s life stage.
Seedling Stage
Young seedlings are especially sensitive to nutrient strength. A common mistake is feeding full strength nutrient solution too early, which can burn tender roots and cause yellowing. Start with a diluted solution, often one quarter to one half strength, and increase gradually.
Vegetative Stage
During vigorous vegetative growth, nitrogen demand is highest, so yellowing at this stage often points directly to nitrogen deficiency or an EC that is too low overall.
Flowering or Fruiting Stage
As plants shift into flowering, potassium and phosphorus demand increases while nitrogen needs decrease slightly. Yellowing during this stage on older leaves can be a natural part of the plant redirecting energy toward flowers or fruit, but excessive or rapid yellowing still warrants a check of your feeding schedule.
🌿 Common Crops and Their Yellowing Tendencies
Different hydroponic crops show sensitivity to different issues.
| Crop | Common Yellowing Trigger | Icon |
|---|---|---|
| Lettuce | Nitrogen deficiency, high water temperature | 🥬 |
| Tomatoes | Magnesium deficiency, calcium and potassium imbalance | 🍅 |
| Basil and herbs | Overwatering related oxygen stress, light issues | 🌿 |
| Peppers | Iron deficiency, pH drift | 🌶️ |
| Strawberries | Root rot, EC too high | 🍓 |
| Cannabis | Nitrogen and magnesium deficiency, light burn | 🌱 |
❓ Frequently Asked Questions
Can yellow leaves turn green again? Once a leaf has turned significantly yellow, it typically will not return to full green health because the chlorophyll structures have broken down. However, correcting the underlying cause will stop further yellowing and allow new growth to emerge healthy.
Should I remove yellow leaves? Mildly yellow leaves that are still partially green can often stay, since they may still contribute some energy through photosynthesis. Fully yellow or dying leaves should be removed to prevent them from harboring pests or disease and to redirect the plant’s energy toward healthy growth.
How often should I check pH and EC? Daily checks are recommended for active hydroponic systems, since pH and nutrient concentration can shift quickly, especially in smaller reservoirs.
Is yellowing always a bad sign? Not always. Some yellowing on the oldest, lowest leaves during natural aging or the transition into flowering is normal. Widespread, rapid, or new growth yellowing is the type that typically signals a real problem.
🌼 Final Thoughts
Yellowing in hydroponic plants can feel alarming, but it is rarely random. Every yellow leaf is the plant’s way of reporting a specific condition, whether that is a nutrient shortage, a pH imbalance, a lighting problem, environmental stress, or a root health issue. By observing exactly where and how the yellowing appears, testing your pH and EC consistently, and inspecting your roots regularly, you can pinpoint the cause with confidence rather than guesswork.
Hydroponic systems reward attentiveness. With a consistent monitoring routine, a properly balanced nutrient solution, stable environmental conditions, and healthy oxygenated roots, most yellowing issues can be corrected within days, and future problems can often be avoided altogether. 🌿💧✨