
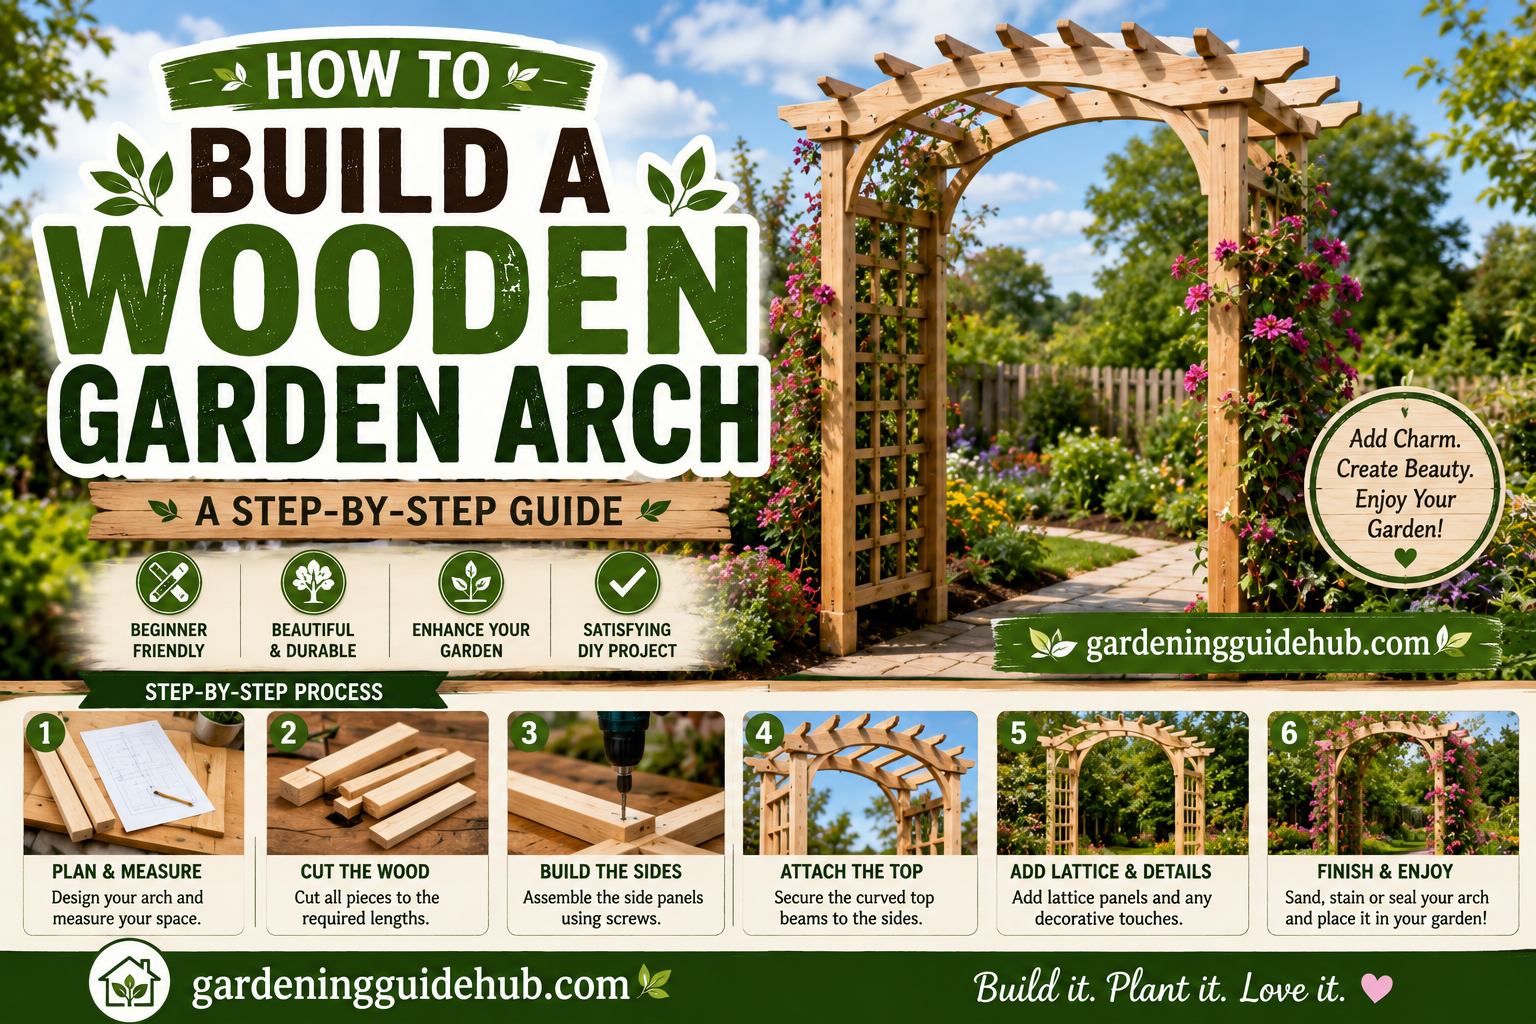
There is something quietly magical about walking through a garden arch. Whether it frames a pathway, marks the entrance to a rose garden, or simply adds a touch of charm to an ordinary fence line, a wooden arch instantly elevates a backyard from plain to picturesque. The best part is that building one yourself is far more approachable than most people expect, even if you have never picked up a power tool before.
This guide will walk you through everything you need to know to build a sturdy, good looking wooden garden arch, from planning and materials to assembly and finishing touches. Grab your tools, clear a weekend, and let us build something beautiful together. 🔨
Why Add a Garden Arch to Your Yard? 💛
Before diving into the build itself, let us talk about why this project is so consistently popular among gardeners and DIY lovers alike.
Benefits of a wooden garden arch:
- Creates a natural focal point that draws the eye through your garden
- Provides a sturdy structure for climbing plants like roses, clematis, or wisteria
- Adds vertical interest to an otherwise flat garden layout
- Frames entryways, pathways, or transitions between garden rooms
- Increases curb appeal and can even boost your home’s overall charm
A well placed arch does not just look pretty, it genuinely changes how a space feels, turning a simple walk through the yard into something a little more special.
Quick Overview: What You Will Need 📋
Here is a simple table summarizing the core supplies for a standard wooden garden arch project, sized for an average pathway width.
| Item | Purpose | Estimated Cost |
|---|---|---|
| Pressure treated 4×4 posts (2) 🪵 | Vertical support beams | $15 to $30 each |
| 2×4 lumber for the arch top 📏 | Curved or angled top structure | $10 to $20 each |
| 2×2 lumber for lattice or slats 🔲 | Decorative side panels | $5 to $10 each |
| Concrete mix 🧱 | Anchoring posts in the ground | $6 to $10 per bag |
| Exterior wood screws 🔩 | Assembling the frame | $10 to $15 per box |
| Wood glue 🧴 | Reinforcing joints | $5 to $8 |
| Exterior stain or paint 🎨 | Weatherproofing and finishing | $25 to $50 |
| Wood sealant 🛡️ | Extra moisture protection | $15 to $30 |
Total cost for a standard garden arch typically falls somewhere between one hundred and three hundred dollars, depending on size, wood type, and finishing choices.
Step One: Planning Your Arch Design 📐
Before cutting any wood, take time to plan out the design and placement of your arch. This step saves you from costly mistakes later in the build.
Things to consider:
- Width of your pathway, since the arch needs enough clearance for people to walk through comfortably, typically at least three to four feet
- Height, with most garden arches standing between seven and eight feet tall to allow comfortable walking clearance
- Style, whether you want a rounded top, a simple flat top, or a peaked, cottage style design
- Location, checking for underground utility lines before digging post holes
- Purpose, since an arch meant to support heavy climbing plants like wisteria needs sturdier construction than a purely decorative one
Sketching your design on paper first, even roughly, helps you visualize proportions and catch potential issues before they become expensive mistakes.
Quick Comparison: Popular Arch Styles 📊
| Style | Description | Best For |
|---|---|---|
| Rounded arch 🌈 | Classic curved top | Romantic garden entrances |
| Flat top arch ⬛ | Simple, clean horizontal top | Modern or minimalist gardens |
| Peaked cottage arch 🏠 | Triangular, pointed top | Cottage or farmhouse style yards |
| Lattice sided arch 🔲 | Crosshatched side panels | Supporting climbing plants |
| Pergola style arch 🌿 | Wider, flatter top with beams | Creating a small shaded walkway |
Choosing a style that complements your home’s existing architecture and garden theme helps the arch feel like a natural, intentional addition rather than an afterthought.
Step Two: Gathering Your Tools 🧰
Having the right tools on hand before you start makes the entire building process smoother and safer.
Essential tools:
- Circular saw or miter saw for cutting lumber
- Drill and driver bits for assembling the frame
- Post hole digger or auger for setting the base posts
- Level to ensure everything stays straight and even
- Measuring tape and pencil for marking cuts
- Clamps to hold pieces steady while securing joints
- Safety glasses and gloves for protection throughout the build
If you do not own every tool listed, many hardware stores offer rental options for items like post hole diggers, which can save money on a one time project.
Step Three: Setting the Support Posts 🧱
Sturdy posts are the foundation of your entire arch, so this step deserves careful attention.
How to set posts properly:
- Mark your post locations based on your desired pathway width, typically three to four feet apart
- Dig holes about two feet deep, or roughly one third of your post’s total height
- Add a few inches of gravel at the bottom of each hole for drainage
- Place the post in the hole and check it is perfectly level on all sides
- Pour concrete mix around the post, following the product’s water ratio instructions
- Brace the post with scrap wood while the concrete cures, usually twenty four to forty eight hours
- Repeat for the second post, double checking that both posts are level with each other and properly spaced
Taking your time here prevents a leaning, wobbly arch down the road, which is one of the most common complaints with rushed DIY builds.
Step Four: Building the Arch Top 🌈
Once your posts are set and the concrete has fully cured, it is time to build the top section that connects the two sides.
For a rounded arch top:
- Cut two matching curved pieces from 2×4 lumber using a jigsaw, or trace a curve using a flexible strip of wood as a guide
- Sandwich the curved pieces together with wood glue and screws for added strength
- Attach the curved top securely to both support posts using exterior screws and metal brackets for reinforcement
For a simple flat top arch:
- Cut a single horizontal 2×4 or 2×6 board to span the distance between your two posts
- Attach the board securely across the top of both posts using exterior screws
- Add decorative trim along the edges if you want a more finished look
Whichever style you choose, double check that everything is level and securely fastened before moving on to the side panels.
Step Five: Adding Side Panels or Lattice 🔲
Side panels are optional, but they add both visual interest and extra support for climbing plants.
Options for side panels:
- Simple lattice panels, which can be purchased pre made or built from thin wood strips
- Vertical slats spaced evenly for a clean, modern look
- Diagonal crosshatch patterns for a more traditional cottage feel
- Open sides with just wire or twine strung between posts for minimalist plant support
Installation tips:
- Measure the space between your posts carefully before cutting panel material
- Attach panels using exterior screws, checking that they sit flush against the posts
- Leave small gaps between slats or lattice pieces to allow for airflow and plant growth
If you plan to grow heavy climbing plants like wisteria, opt for sturdier lattice or a solid trellis pattern rather than delicate wire, since mature vines can become surprisingly heavy over time.
Step Six: Sanding and Finishing 🧽
This step transforms your arch from a rough construction project into a polished garden feature.
Finishing checklist:
- Sand all exposed surfaces to remove splinters and rough edges
- Wipe away sawdust with a damp cloth before applying any finish
- Apply exterior wood stain or paint in your chosen color
- Allow the first coat to dry fully before applying a second coat for even coverage
- Finish with a clear wood sealant for extra protection against moisture and sun exposure
Popular finish choices:
| Finish Type | Look | Maintenance Level |
|---|---|---|
| Natural wood stain 🪵 | Warm, classic wood tone | Moderate, reapply every 1 to 2 years |
| White paint ⚪ | Bright, cottage garden feel | Moderate, touch ups as needed |
| Black paint ⬛ | Bold, modern contrast | Low to moderate |
| Weathered gray stain 🌫️ | Coastal, relaxed aesthetic | Low, ages gracefully |
Choosing a finish that complements your home’s exterior or existing garden features helps the arch feel like a cohesive part of your overall landscape design.
Step Seven: Adding Climbing Plants 🌸
Once your arch is built and finished, the final step is choosing plants to complete the look. Climbing plants soften the wood’s structure and bring your arch to life over time.
Popular climbing plants for garden arches:
| Plant | Bloom Season | Growth Speed | Fragrance |
|---|---|---|---|
| Climbing roses 🌹 | Late spring to summer | Moderate | Classic floral |
| Wisteria 💜 | Spring | Fast, needs regular pruning | Strong and sweet |
| Clematis 🌸 | Spring to summer | Moderate | Light |
| Honeysuckle 🍯 | Summer | Fast | Sweet, strong |
| Morning glory 🌅 | Summer | Very fast, annual | None |
Keep in mind that vigorous growers like wisteria require sturdy construction and regular pruning to prevent them from overwhelming or damaging the arch over time.
Maintenance Tips to Keep Your Arch Looking Great 🛠️
A wooden garden arch is a long term investment, and a little regular care keeps it looking beautiful for years to come.
| Task | How Often |
|---|---|
| Inspect for loose screws or joints 🔍 | Every 6 months |
| Reapply stain or sealant 🛡️ | Every 1 to 2 years |
| Check post stability 🧱 | Once a year |
| Prune climbing plants away from joints 🌿 | Seasonally |
| Clean surface dirt and mildew 💦 | Once or twice a year |
Staying ahead of small maintenance tasks prevents bigger, more costly repairs down the line and keeps your arch structurally sound for many seasons.
Common Mistakes to Avoid ⚠️
Even a straightforward project like a garden arch can run into a few avoidable issues.
- Skipping proper post depth, which leads to leaning or instability over time
- Choosing wood that is not rated for outdoor or ground contact use
- Forgetting to check for underground utilities before digging post holes
- Underestimating the eventual weight of mature climbing plants
- Leaving wood unsealed, which speeds up weather damage and rot
Taking a little extra care during planning and construction saves significant time and money on repairs later.
A Sample Weekend Build Plan 🗓️
If you want a clear plan to follow, here is how a typical build might break down across two days.
Saturday morning: Finalize your design, gather materials, and mark post locations.
Saturday afternoon: Dig holes and set posts in concrete, allowing time to cure.
Sunday morning: Build and attach the arch top and side panels.
Sunday afternoon: Sand, stain or paint, and add your chosen climbing plants.
Since concrete typically needs twenty four to forty eight hours to fully cure, some builders prefer setting posts on a Friday evening or spreading this project across two weekends for the sturdiest final result.
Final Thoughts 🌼
A wooden garden arch is one of those projects that delivers far more visual impact than its relatively modest cost and effort would suggest. With sturdy posts, a thoughtfully built top structure, and the right finishing touches, you can create a charming focal point that frames your garden beautifully for years to come.
So this weekend, gather your tools, pick a style that speaks to you, and start building. Before long, you will have a gorgeous new entryway to your garden, one that only gets more beautiful as climbing plants weave their way across it season after season.
Happy building! 🔨🌿